GarageBand Creating Space in a Mix
Mixing music and/or sound for film can be like trying to tame a monster. The mix engineer has been given tracks upon tracks of noises that are fighting to be heard clearly. So, the main task of mixing a project is to get everything in order and begin
Once each sound or track has been put in its proper place, made to sound pretty, and been given appropriate volume, those noises fighting to be heard no longer have to fight. A good mix is so well-balanced that no matter how quiet a certain sound is, it can still be heard because of EQ and placement. All audio tracks in mixed projects should work with each other and not against.
- cleaning up unwanted noises that have bled into the track by using a gate
- making each track sound as beautiful as possible through EQ
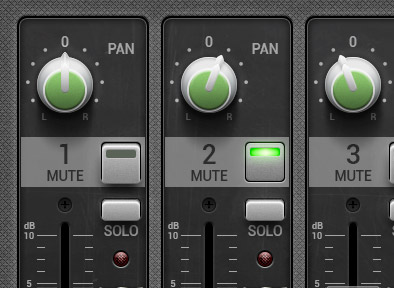
- placing each sound/track in its unique location in the stereo spectrum by panning
- giving each sound/track depth through volume, additional EQ, and compression
Once each sound or track has been put in its proper place, made to sound pretty, and been given appropriate volume, those noises fighting to be heard no longer have to fight. A good mix is so well-balanced that no matter how quiet a certain sound is, it can still be heard because of EQ and placement. All audio tracks in mixed projects should work with each other and not against.
Important Effects/Filters
In the last lesson, you learned about EQ. Without proper EQ it is almost impossible to make a mix sound good, no matter how you pan or volume mix. Here are some additional effects/filters used in the mixing process to aid in creating the best mix possible.
Noise Gates
Noise Gates are extremely useful when you want to get rid of unwanted noise (buzzes, hums, or microphone bleed-through)
How it works:
How it works:
- You set the threshold to a level by which only sounds that are loud enough can pass through the gate
- All other unwanted noise will not be heard

Compression
- One of the most useful processors
- One of the most abused processors
- Compresses (narrows) the dynamic range of a sound
- Limits how loud a sound can be
- Reduces the difference between the loudest and softest of sounds
Used for Three Main Purposes:
- Keeping transients (the initial attack of an instrument) from creating digital distortion during tracking
- Balancing any performance that shows signs of a high degree of unwanted dynamic variation (volumes)
- Raising the overall apparent level of the music during mastering
Compressor Parameters
- Knee: Controls how the compressor behaves while the input signal passes the threshold (the lower the setting = the more gradual it acts)
- Attack: Controls how soon the compressor kicks in
- Gain: Adjusts the level (volume) of the signal going out of the compressor
- Ratio: The amount the signal is reduced by every time it goes 1dB over the threshold (2:1 = signal is reduced by two)
- Release: How long the compressor continues affecting the signal after it drops below the threshold
- Thresh: The decibel level at which the compressor starts to act on the signal
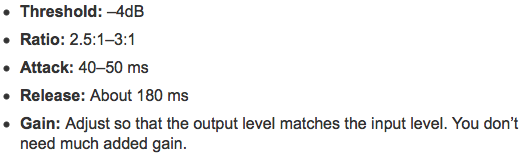
Typical Lead Vocal Compression Settings
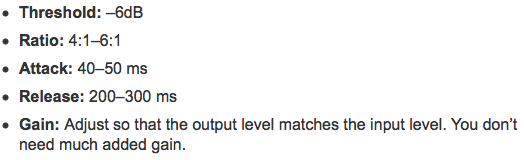
"In Your Face" Lead Vocal Compression Settings
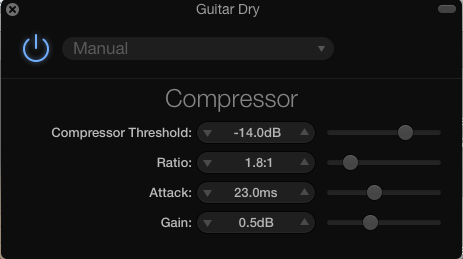
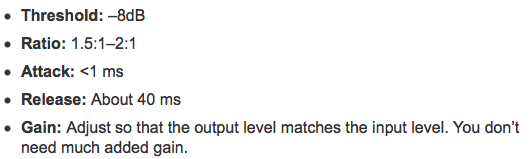
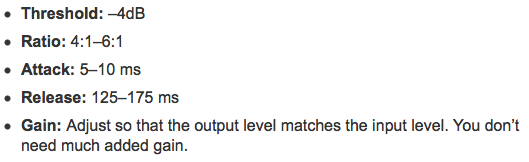
Typical Electric Guitar Compression Settings
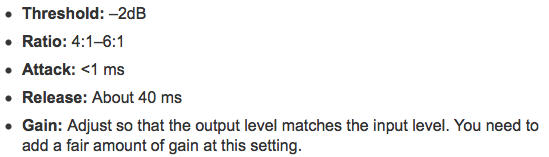
Typical Electric Bass Compression Settings
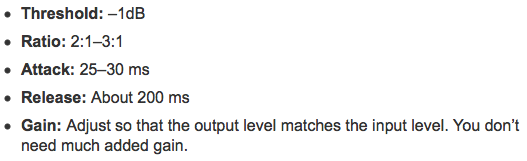
Typical Drum Compression Settings
Kick
Snare
Panning Drums
Imagine that you are playing a drum kit. Pay close attention to where all of the drums are located in proximity to your ears
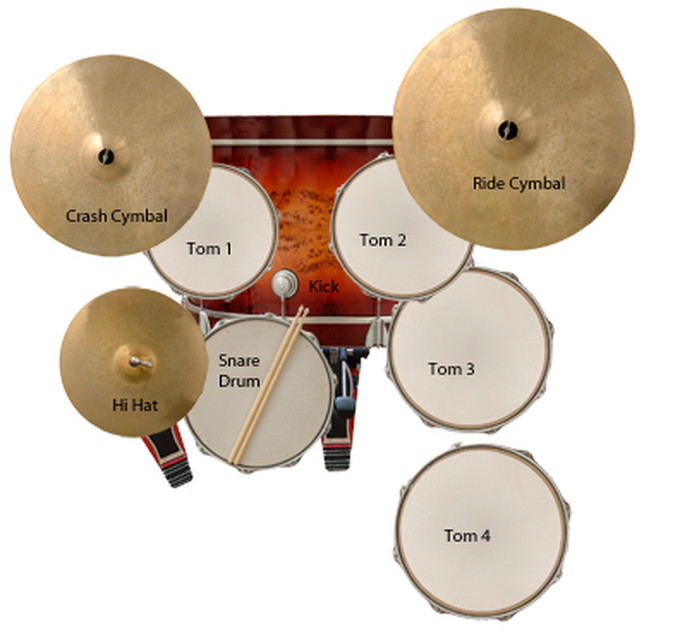
Think of your pan knob as a clock...
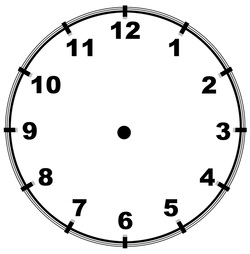
12:00 - Kick, Snare, Hats, Tom 2
8:00-11:00 - Crash Left, Tom 1
1:00-4:00 - Crash Right, Ride, Tom 3
Anything that is not panned to the center needs to be evenly spaced in its own place
8:00-11:00 - Crash Left, Tom 1
1:00-4:00 - Crash Right, Ride, Tom 3
Anything that is not panned to the center needs to be evenly spaced in its own place
Mixing Drums
Download the project file below. Today we will learn the basics of mixing drums.
| bobbynobody_stems.zip |
