GarageBand Tracking
Importing a Track
1. Download the mp3 file below
| chick-fil-a.mp3 |
2. Launch Garageband
|
|
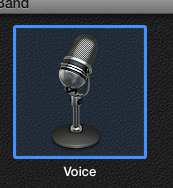
3. Open a new Voice project
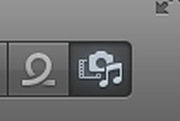
4. Click on the Media Browser Button in the upper right-hand corner
5. Find your downloaded file at the bottom of the Media list

6. Drag and drop the mp3 onto the timeline next to Narration Vocal (Narration Vocal will automatically be renamed tot he name of the imported file)
What is a track?
- A unique, singular, individual building block of an audio project
- Contains at least one discrete element or sound (region)
- Can be audio or MIDI
- Layed out horizontally in GarageBand

Real Instrument Tracks & Software Instrument Tracks
- Real Instrument Tracks - used to record live audio (guitars, voices, drums, etc.)
- Software Instrument Tracks - used to record audio that is played on a MIDI (Musical Instrument Digital Interface) controller (MIDI piano keyboard)
Creating & Naming Tracks
- Creating a New Track - 3 different ways:
- Click the plus button in the lower left-hand corner of the interface
- Click on the Track Menu and select New Track
- or Press Option+Command+N
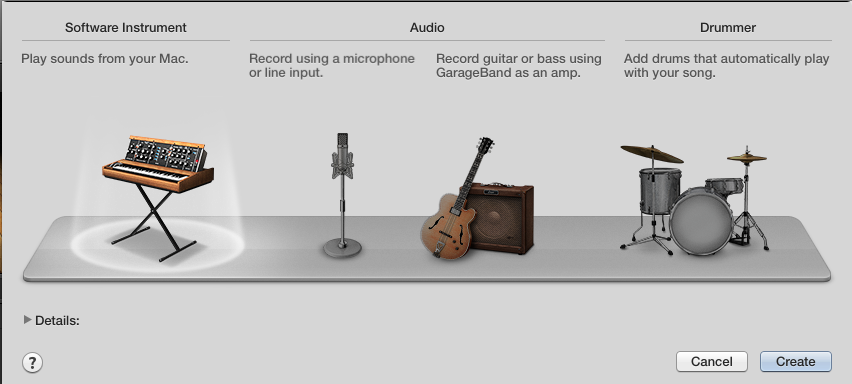
- Types of New Tracks
- Software Instrument
- Audio (Microphone, Guitar, or Bass)
- Drummer
- Editing a Track's Name
- Double-click on the text of the existing track's name to highlight it
- Begin typing in the new name
- Press Return
Duplicating & Deleting Tracks
- Duplicating a Track - smart way to record more tracks without losing the same EQ and effects as the initial track
- Click on the Track
- Click on Track Menu
- Select Duplicate
- or Press Command+D
- Deleting a Track
- Click on the Track
- Click in the Track Menu
- Select Delete
- or Press Command+Delete
Reordering Your Tracks
- You may want to group your tracks in a particular order (i.e. all drums tracks together)
- Click on the Track you want to move
- Move it up or down to the desired location
Working in the Timeline
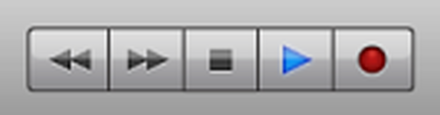
- Transport Controls - Record, Play, Stop, Fast-Forward, Rewind, and Return-to-Zero Buttons
- The Playhead & Timeline Grid
- Playhead - the triangular marker with the thin, white hairline extending down the length of the GarageBand window
- Ruler - measures time or measures and is located at the top of the GarageBand window
* double-click the ruler in any location to instantly begin playing at that spot *

- Scrolling & Zooming
- Scroll Bars - located on the right side and bottom of the Timeline window
- Zoom Slider - enables you to zoom in (to edit fine details) or out and is located below your tracks on the lower-left side of the Timeline window
- Audio Region
- Created every time you press Record, play something, and then press Stop
- Each created region is an individual, movable audio object within the Timeline grid
- Can be copied and pasted
- Can be moved around by clicking on them and dragging them
- Can be deleted by clicking on them and pressing Delete or Backspace
In-Class Exercise
*** Before you begin, mute the existing imported track. You will not be using it for this exercise. ***
Trimming & Looping Audio
Create an Audio Region
Trim Cursor
Looping a Region
- Create a New Track by pressing the + icon in the lower, left-hand corner of the GarageBand window
- Click the microphone icon
- Click Create
- Press the Record button to begin recording and say, "One, two, three, four, five."
- Press Spacebar to stop the recording
- The built-in microphone on your iMac should have picked up your voice and recorded it into GarageBand
- You now should have an Audio Region to work with
Trim Cursor
- If you position your mouse to the head (beginning) of the region or the tail (end) of the region, the regular mouse arrow turns into a Trim Cursor
- Utilize the Trim Cursor to trim off the beginnings or ends of any region by clicking and dragging from the head or the tail to your desired trim location
- Try this on the audio region you created by trimming off the "one" and the "five"
- If you trim too much off you can drag it back and the audio will reappear
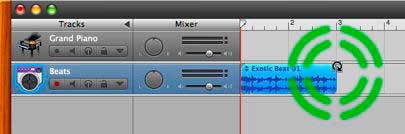
Looping a Region
- You can loop an Audio Region by placing your mouse cursor at the top-corner of the tail (end) of your region
- The mouse cursor turns into a Looping cursor
- Simply click and drag the tail of the region to the right to loop your region the desired amount of times
Track Mixer Controls

- Track Volume & the LED Level/Clipping Indicators
- Panning
- Mute (Megaphone icon)
- Solo (Headphones icon)
- View/Hide Track Automation by pressing A
Groove Matching
- Synchronizes the groove of all your tracks to a master "groove" track of your choice
- Right-click on the track in which you want to select as the Groove Track, then go to Track Header Components, then to Show Groove Track
- Hover your mouse over the far-left edge of the track you wish to designate as the Groove master and click on the star, then check the boxes of all other tracks you wish to synch to the groove of the Groove Track
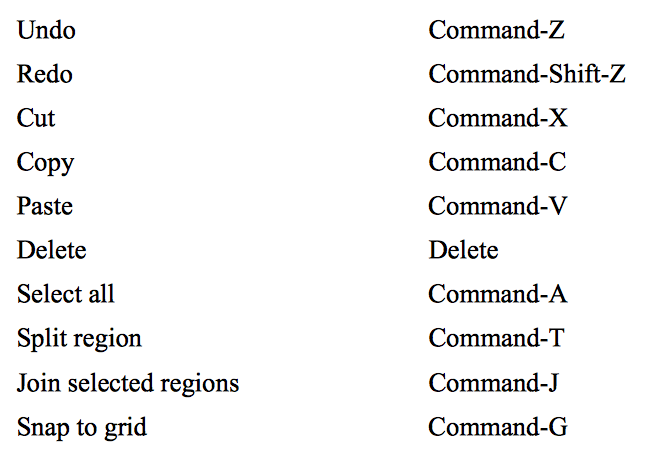
Editing Shortcuts
Assignment
| chick-fil-a.mp3 |
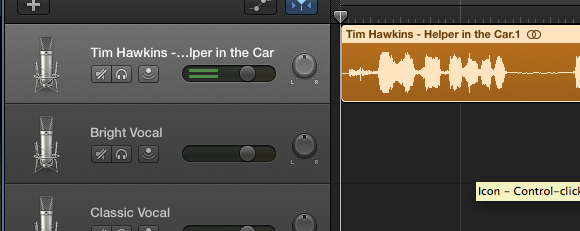
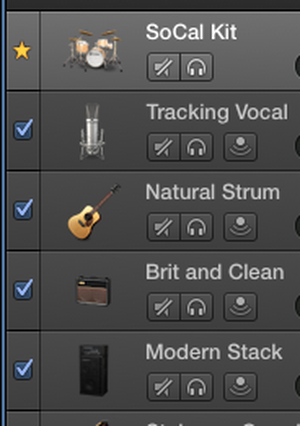
Drag the imported audio region (Tim Hawkins Chick-Fil-A track) to the various tracks and audition them by pressing play (spacebar).
Notice how each vocal track sounds different because of the preset filters placed upon each track.
Utilize the cycle feature and find a small section of the audio region that sounds great looped over and over.
1. Split the region, separating your chosen phrase from the rest of the region
2. Delete the region you do not need
3. Copy and paste the kept region four times
4. Join all of the pasted regions together as one continuous region
Another (and easier) way of looping a region is to grab the top-right corner of the region and drag it to the right.
5. Split the region again so that you have your phrase from step 1.
6. Delete the region you do not need.
7. Grab the top-right corner of the region and drag it to the right until you have four sections of the looped region.
Congratulations, you've just successfully sampled part of an audio track and have created a loop.
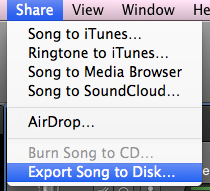
8. Bounce out a mix down of your region by going to Share > Export Song to Disk.
Notice how each vocal track sounds different because of the preset filters placed upon each track.
Utilize the cycle feature and find a small section of the audio region that sounds great looped over and over.
1. Split the region, separating your chosen phrase from the rest of the region
2. Delete the region you do not need
3. Copy and paste the kept region four times
4. Join all of the pasted regions together as one continuous region
Another (and easier) way of looping a region is to grab the top-right corner of the region and drag it to the right.
5. Split the region again so that you have your phrase from step 1.
6. Delete the region you do not need.
7. Grab the top-right corner of the region and drag it to the right until you have four sections of the looped region.
Congratulations, you've just successfully sampled part of an audio track and have created a loop.
8. Bounce out a mix down of your region by going to Share > Export Song to Disk.
9. Save as YOURLASTNAME.loop

