Logic Pro X Interface
Quick Overview of Logic Pro X
Menus
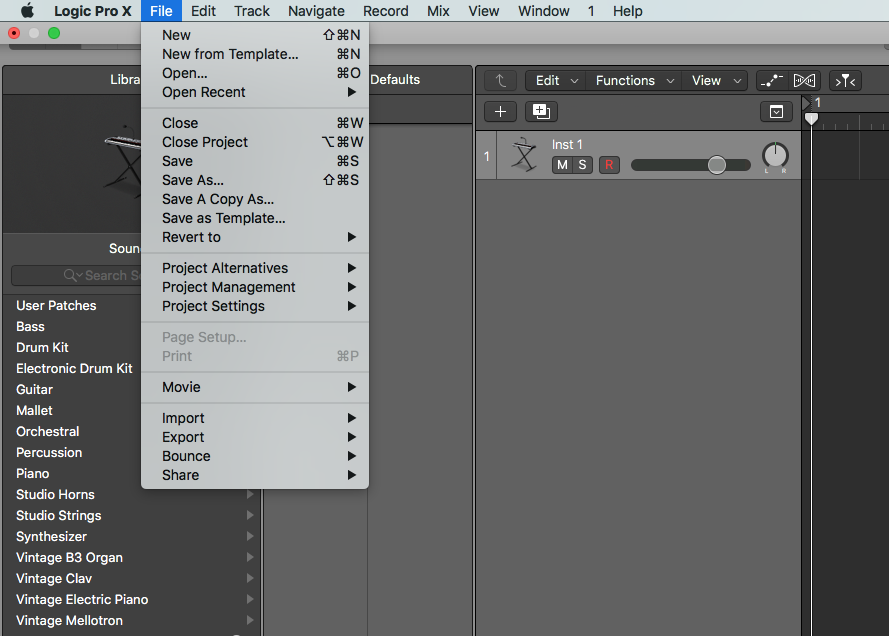
File Menu
- Very self-explanatory
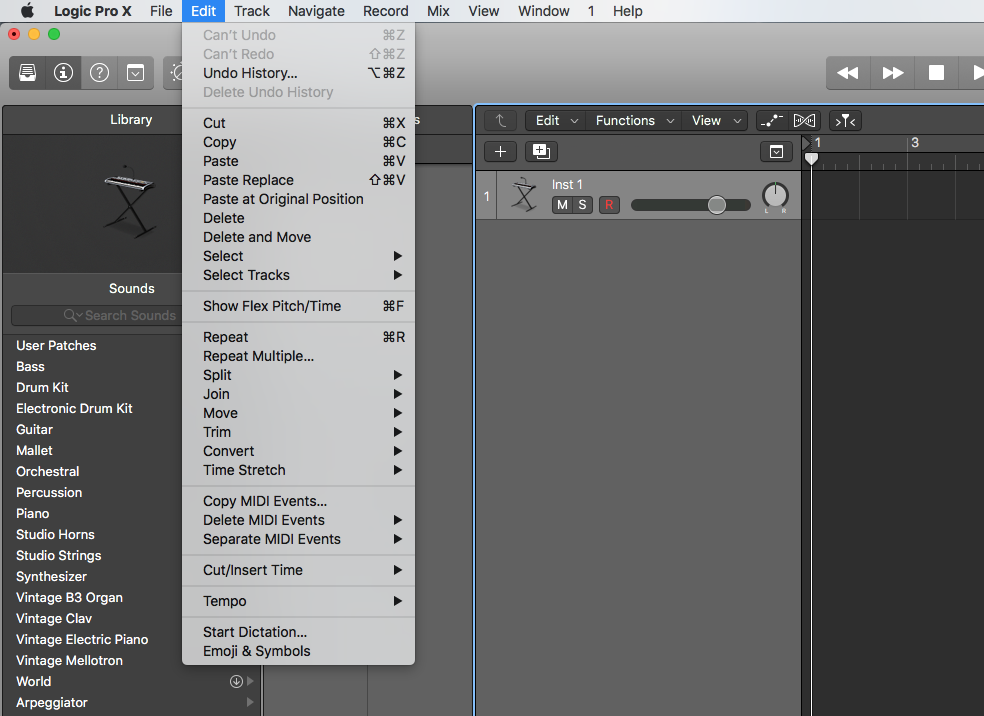
Edit Menu
- Presents you with a series of choices that allow you to edit specific objects, copy and paste, and select Special Characters when scoring a song
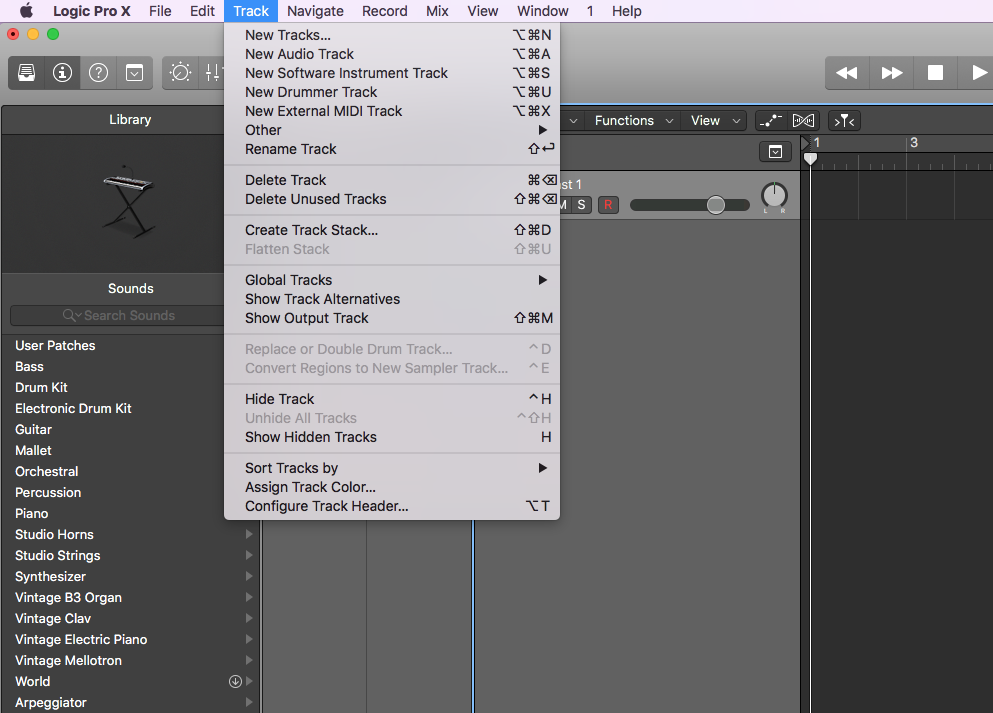
Track Menu
- Allows you to customize the features of your individual tracks
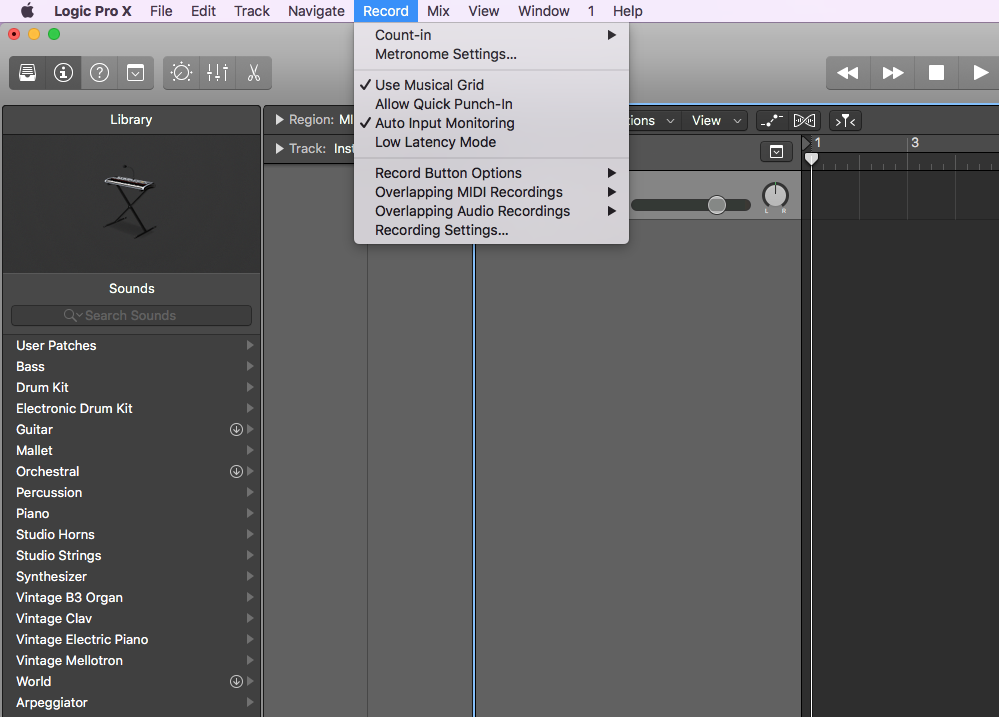
Record Menu
- Gives you the option of having a 1- or 2-bar count-in or recording without a count-in
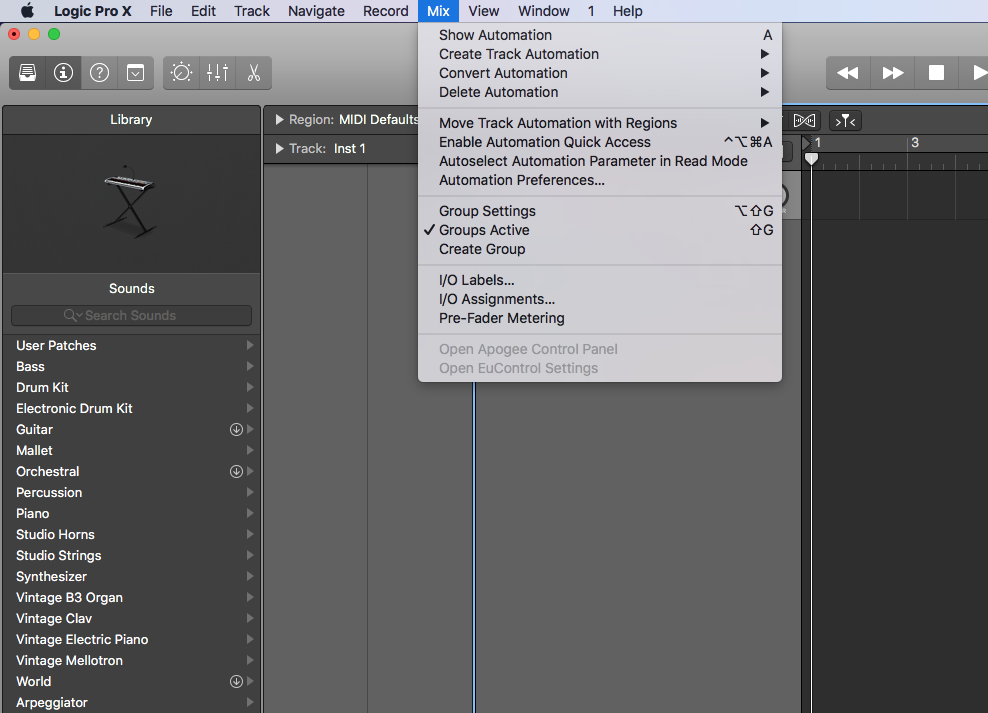
Mix Menu
- Gives you automated mix options
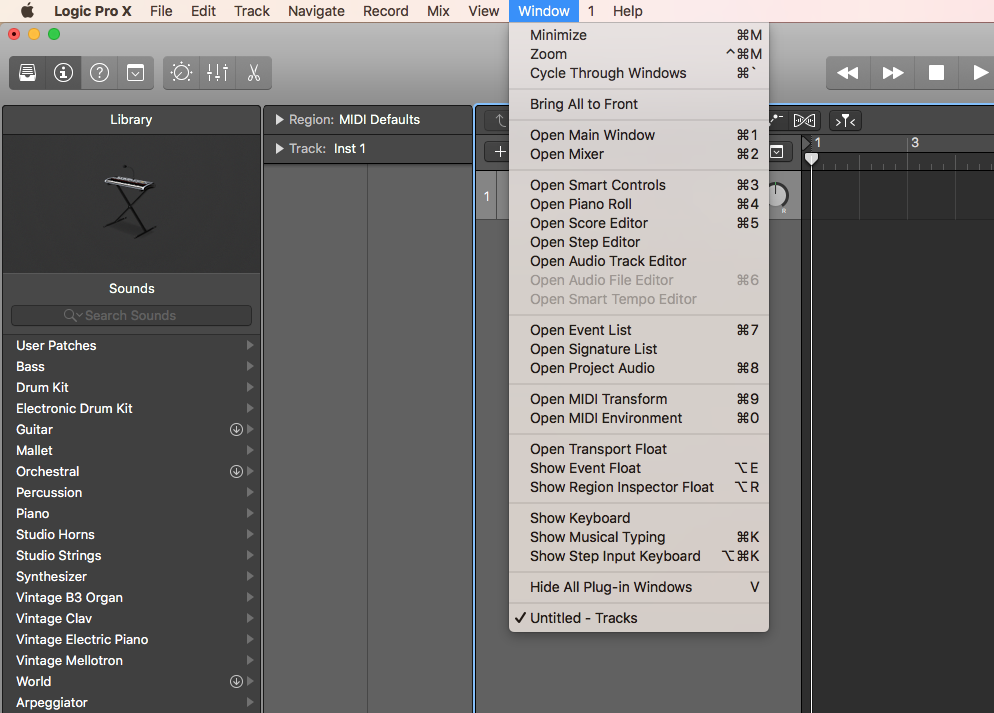
Window Menu
- Allows you to minimize your main window, and open up the mini keyboard and musical typing functions
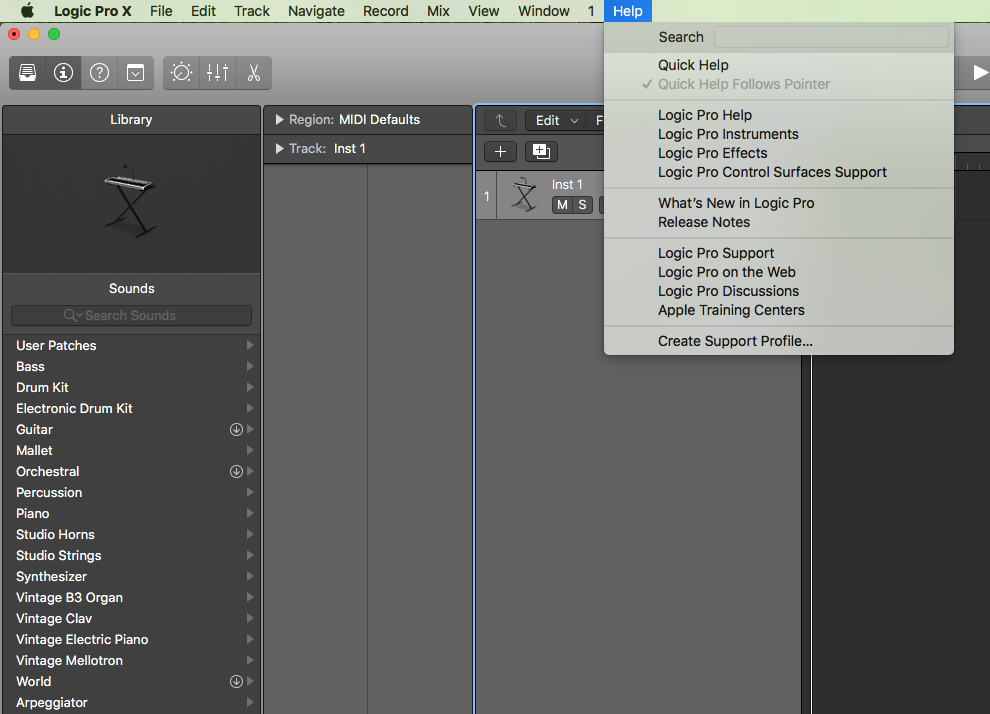
Help Menu
- Like it says, use this if you need extra Help
- Search bar - function for quick access to answers
- Quick Help - by selecting this function the Quick Help box will display explanations and short-cut key commands on whatever your mouse hovers over
- Logic Pro Help - this feature gives you detailed information on all aspects of Logic Pro X
- Apple Training Centers - link to the Apple Training Center page, where you can become a trained expert and get certified by Apple in OS X and Apple Pro applications
Application Interface
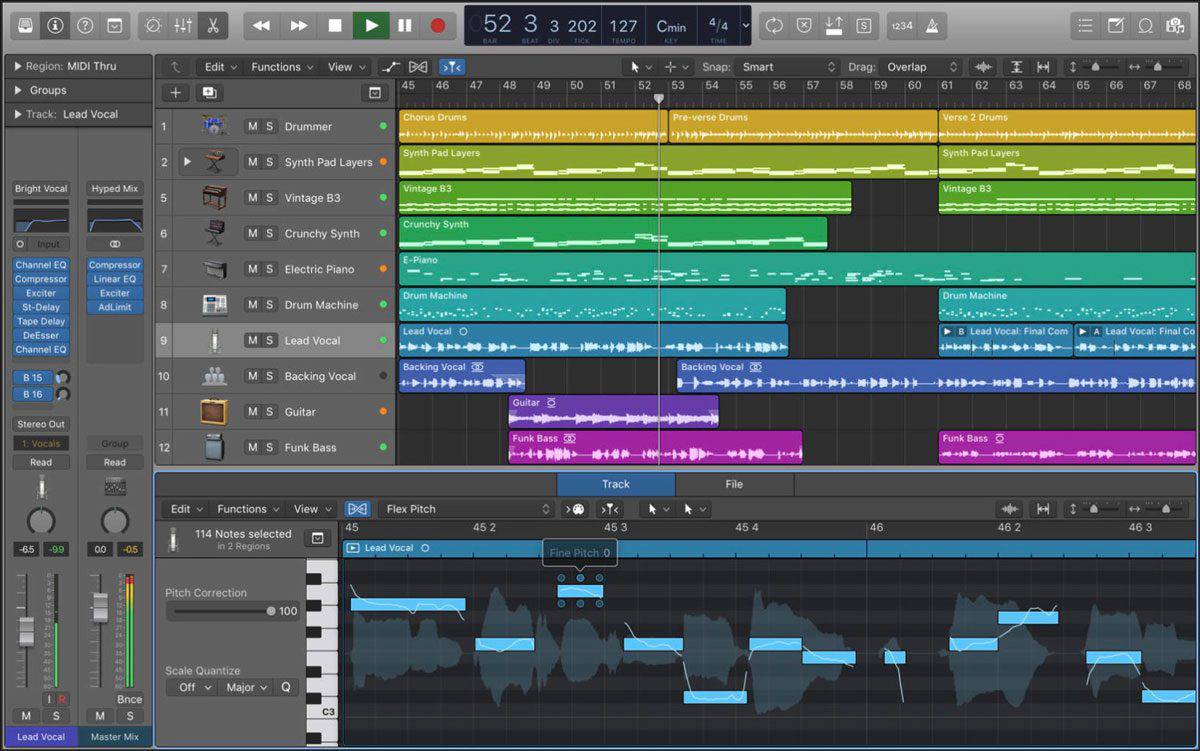
The Timeline
- The main workspace area of Logic Pro X
- Access to all of your audio and MIDI regions
- Where your audio gets recorded and laid out in linear time
The Transport Controls
- The control strip that gives you the ability to push play, stop, rewind, fast-forward, and record
- Also Contains:
Tempo display in beats per minute (bpm)
Key Signature
Time Signature
Cycle region on/off
Metronome on/off
Tuner on/off

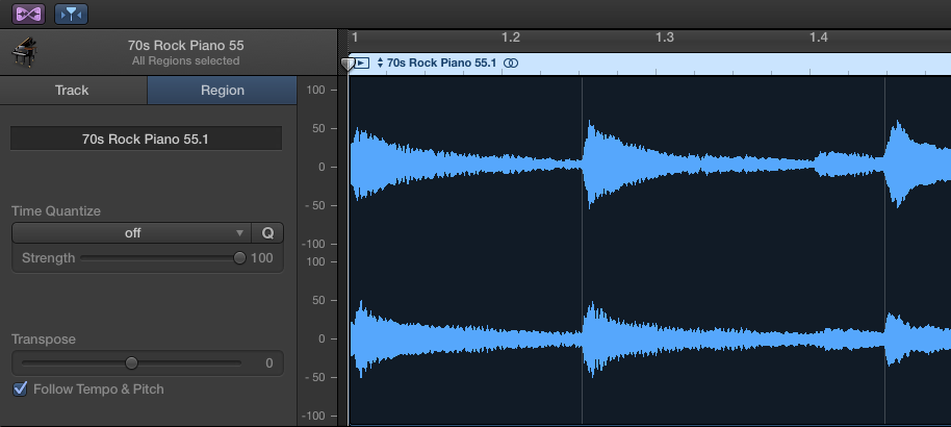
The Editor
- The window where all of the fine editing is done
Adjust pitch
Quantize (enhance timing)
Transpose (change key)
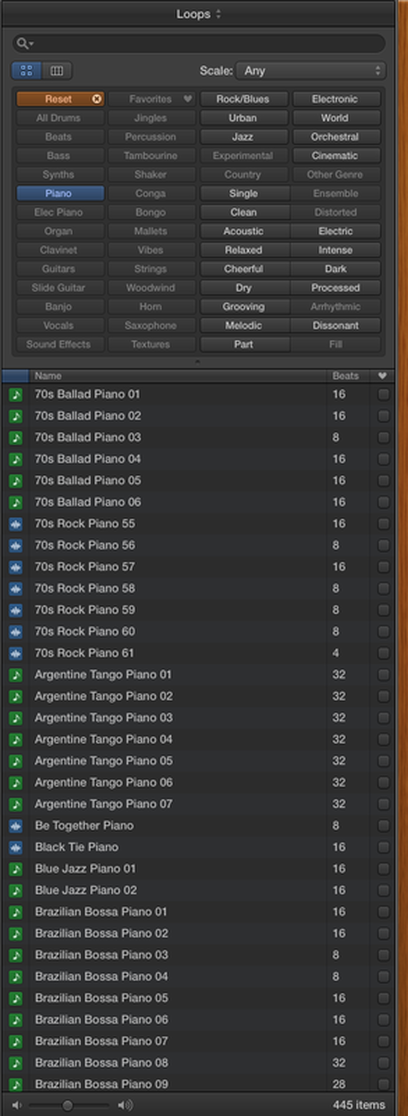
The Loop Browser
- Preview and select Apple Loops, Jam Packs, and custom loops
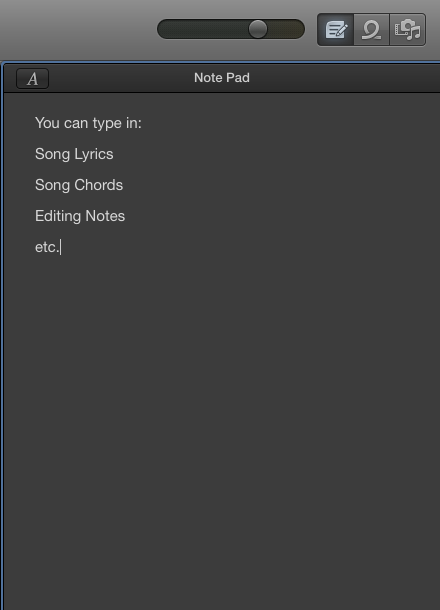
Notepad
- Access to effects processing and software instrument sounds
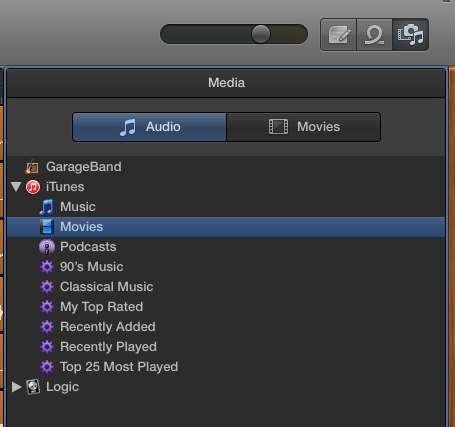
The Media Browser
- Access to your GarageBand and iTunes media
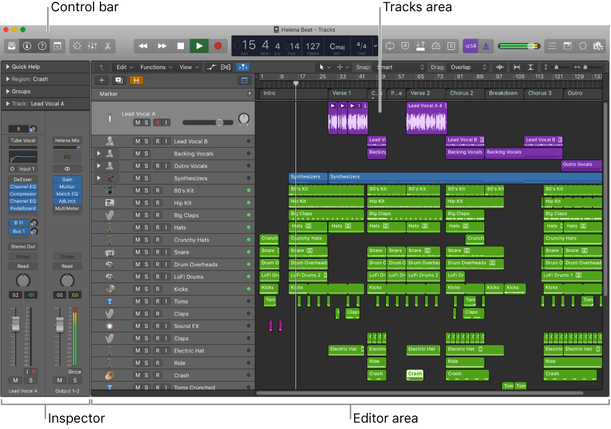
Logic Pro X Main Window Interface
You create and play projects in the Logic Pro main window. The main window is organized into different areas to help you focus on different aspects of your project, such as recording, arranging, and mixing. Buttons in the control bar show or hide different areas of the application.
The main areas of the Logic Pro window include:
- Tracks area: Where you record audio and MIDI regions, add Apple Loops and other media files, and arrange the regions to build your project.
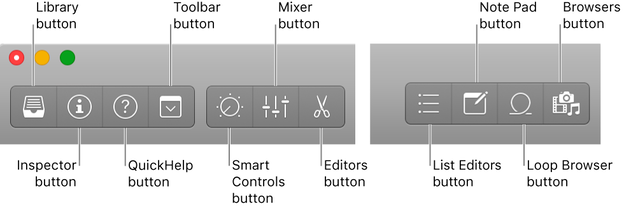
- Control bar: Includes the transport controls you use to control playback of your project, buttons to show and hide the different areas of Logic Pro, and buttons for other frequently used commands. You can customize the control bar to suit your way of working.
- Toolbar: Contains additional buttons and controls for the Tracks area and other areas of Logic Pro. You can show and hide the toolbar to optimize available screen space.
- Inspector: Shows parameters for selected regions, tracks, and other items. The available parameters change depending on the area in which you are working, and what type of item is selected.
- Smart Controls: A simplified set of visual controls that you can use to quickly modify the sound of the current patch without having to edit individual channel strip or plug-in settings.
- Mixer: Shows channel strips for each track in the project, as well as auxiliary, output, and master channel strips. You can view and edit channel strip controls, customize routing options, and add and edit plug-ins in the Mixer.
- Editors: Logic Pro features a set of editors, including the Audio Track Editor, Piano Roll Editor, Score Editor, Step Editor, and Audio File Editor, which you use to make precise changes to individual regions and their contents.
- List Editors: An area where you can view and edit MIDI events, markers, tempo, and time signature events numerically.
- Note Pad: Features text areas where you can create, view, and edit project and track notes.
- Loop Browser: Gives you access to the included Apple Loops library so you can search for loops and preview them, then add them to your project.
- Browsers: You can view the audio files in your project in the Project Audio Browser, add audio and movie files from the Media Browser, and browse your computer and connected storage devices using the All Files Browser.
In-Class Exercise
Click on the following link, then complete the exercise...
